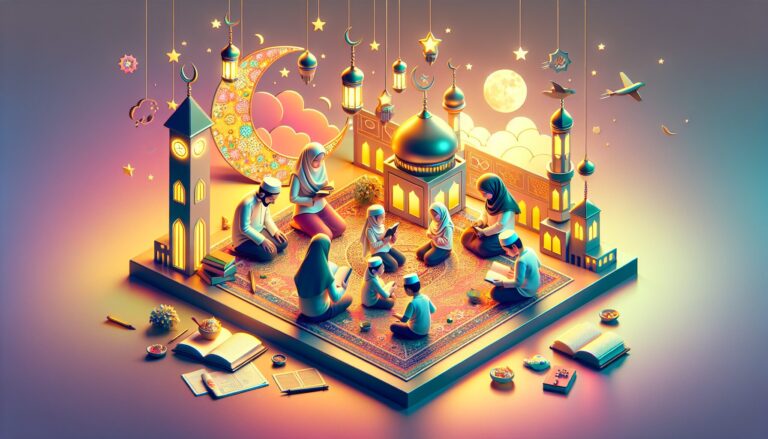
Hey there, crafty friends! Imagine this: A few years ago, my family and I were gathered around the dining table, bits of colored paper and glue sticks scattered everywhere. It was the first time we decided to make decorations for Eid together, and the laughter and creativity that filled the room were unforgettable. Turns out, creating Islamic holiday crafts is not just about making something beautiful—it’s about the joy and bonding that comes with it. Whether you’re a seasoned crafter or just starting out, diving into these meaningful projects can bring a sprinkle of tradition and a whole lot of fun into your home. Ready to explore the world of Islamic Holiday Crafts for Families? Let’s get those creative juices flowing!
Crafting Beautiful Eid Cards
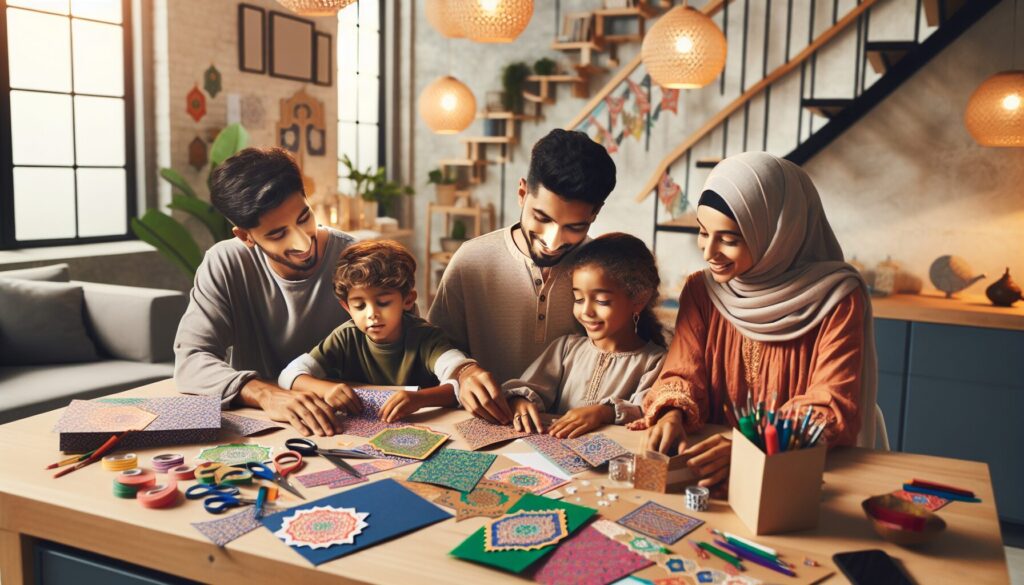
Crafting your own Eid cards is such a joyful way to celebrate the spirit of giving and creativity. Imagine the excitement on your loved one’s face when they receive a beautiful, handmade card! Making Eid cards is a delightful activity that families in New Zealand can enjoy together. It’s a wonderful way to add a personal touch to your Eid greetings and make the holiday even more special.
To get started, gather some basic supplies like colored paper, markers, stamps, and stickers. You might also want to include some traditional elements like crescent moons or stars. These symbols are simple yet meaningful, and they add a touch of tradition to your creations. If you’re feeling adventurous, try incorporating some Maori designs as a nod to New Zealand’s rich cultural tapestry.
Steps to Create Stunning Eid Cards
Creating Eid cards is an easy, step-by-step process that anyone can do. Here are some steps to guide you:
- Choose your card base: Start with a thick piece of cardstock or craft paper. This will be the foundation of your card, so choose a color that you love.
- Design your layout: Think about the message you want to convey. You can sketch a draft on a scrap piece of paper to plan your design.
- Add decorative elements: Use stickers, stamps, and cutouts to decorate the front of the card. Consider using a glue stick or double-sided tape for a neat finish.
- Write a heartfelt message: Inside the card, write a warm message or a prayer. This is a great opportunity to teach children about the significance of Eid.
- Personalize it: Add personal touches like a family photo or a small drawing. This makes the card even more special for the recipient.
Once you’re done, take a moment to admire your handiwork. These cards are not only a creative expression but also a way to share your love and joy with family and friends. Additionally, crafting together can be a bonding experience for families, allowing you to spend quality time with each other while embracing the festive spirit.
For those interested in exploring more about traditional crafts, you might want to check out resources from organizations like Islamic Women’s Council of New Zealand or New Zealand Eid Day. They often provide great insights and ideas for celebrating Islamic holidays with creativity and joy. Eid cards are just one way to celebrate, but they’re a beautiful way to bring smiles to the faces of those you hold dear.
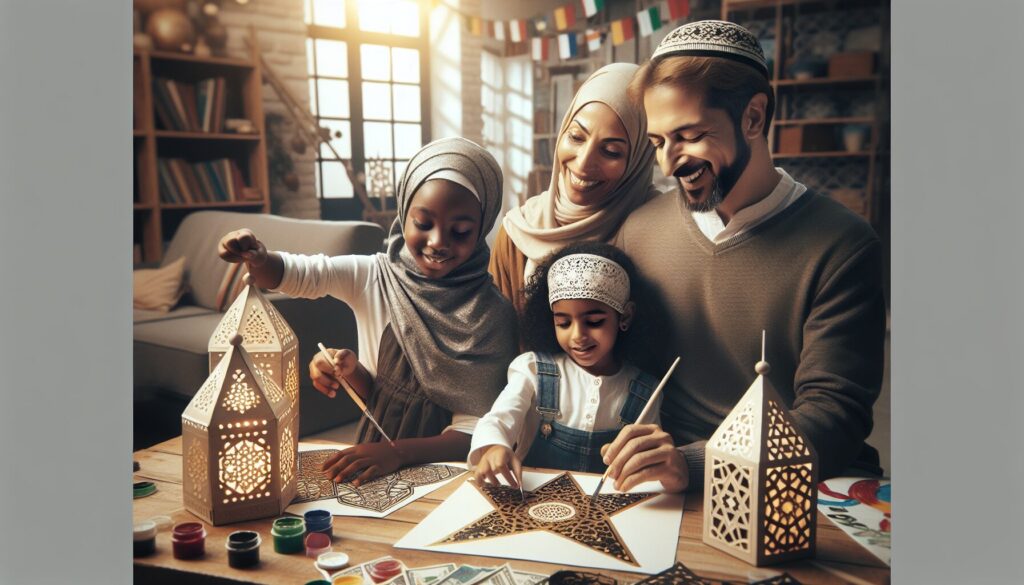
Creating DIY Ramadan Lanterns
Creating DIY Ramadan lanterns is such a delightful way to celebrate and embrace the spirit of the holy month. It’s a craft that brings families together, sparking creativity and joy. These lanterns, often called “Fanous,” are a beautiful symbol of light and hope. Now, let’s dive into how you can create your very own lanterns right at home.
Start by gathering your materials. You’ll need some colored paper, scissors, glue, and a small LED candle. You could even add some glitter or stickers for a touch of sparkle. These supplies are readily available at local stores or online, making it convenient for families in New Zealand to get started on their craft projects.
Steps to Craft Your Lantern
- Cut Your Paper: Take your colored paper and cut it into a rectangle, about 30cm by 15cm. This will form the body of your lantern.
- Create the Design: Fold the paper in half lengthwise. Then, cut slits along the folded edge, leaving about 2cm at the top. Be careful to not cut all the way through!
- Form the Lantern: Unfold the paper and curve it into a cylinder. You can secure the ends with glue or tape.
- Add the Base: Cut a circle matching the diameter of your lantern’s base. This will help stabilize the lantern and hold the LED light.
- Decorate: Use glitter, stickers, or even draw designs to make your lantern unique. This is where children can let their imagination run wild!
- Light It Up: Place a small LED candle inside. Remember, safety first—always use LED lights to avoid any risk of fire.
These lanterns can be hung around the house or used as a centerpiece during Iftar. They also make a lovely addition to Islamic holiday crafts for families, encouraging everyone to participate and learn. While crafting, you might want to share stories or traditions that your family cherishes. It’s a wonderful way to pass down cultural values and create lasting memories.
For those curious about how to integrate such meaningful crafts into broader celebrations, consider exploring our guide on creating memorable Islamic holiday traditions for families. It’s packed with ideas to make your celebrations even more special.
Don’t forget, crafting is more fun when done together. Whether you’re working with kids, friends, or the community, the process itself becomes a cherished memory. You might even want to reach out to organizations like the Islamic Women’s Council of New Zealand for community events or workshops.
For inspiration, you can check out some local craft stores in places like Auckland or Wellington that might offer materials and even classes.
Designing Islamic Calligraphy Art
I remember the first time I tried calligraphy with my own children. We spread out paper on our kitchen table, and even though our first attempts were wobbly, the sense of peace and focus in the room was wonderful. It’s a craft that’s as much about the process as the result.
Designing Islamic calligraphy art can be such a fulfilling activity, especially when you dive into the world of creativity and culture. It’s like adding your own personal touch to the beauty of language. In New Zealand, where the mix of cultures is as vibrant as a rainbow on a rainy day, this art form can connect families in beautiful ways.
First, gather your materials. You’ll need some quality paper, a selection of pens or brushes, and some ink. For a touch of local flair, you might even consider using some traditional Maori patterns as inspiration for borders or backgrounds. Isn’t it amazing how art can bridge different cultures and traditions?
Steps to Creating Your Masterpiece
Here’s a simple way to start your calligraphy journey:
- Choose a Phrase: Pick a meaningful phrase or word. It could be something that resonates with your family or an inspiring quote.
- Practice Basic Strokes: Before diving into the actual artwork, practice the basic strokes and letters. This helps in gaining confidence and control over the pen.
- Sketch Your Design: Lightly sketch out your design on paper. This step is crucial for planning the layout and understanding how your words will flow.
- Begin Your Art: Start inking the words. Take your time, and remember that each stroke is part of the art’s beauty.
- Add Decorative Elements: Enhance your artwork with decorative elements. Perhaps a little nod to the Maori designs, weaving in a touch of New Zealand’s spirit?
Calligraphy isn’t just about the final product; it’s about the peace and reflection that comes with each stroke. It’s no wonder families find it such a rewarding activity during Islamic holidays. You get to create something special together while celebrating your heritage.
For more inspiration or guidance, consider reaching out to organizations like the Islamic Women’s Council of New Zealand or local art groups. They often have resources or workshops to help you perfect your craft.
By embracing art, you’re not just creating something beautiful—you’re weaving stories and traditions into your family’s tapestry.
Making Decorative Prayer Mats
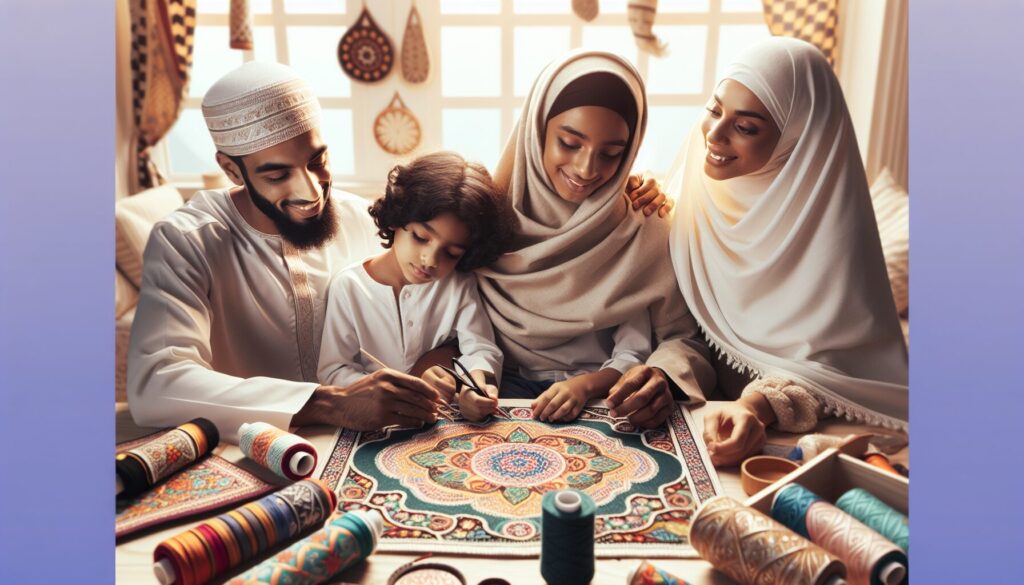
Creating decorative prayer mats at home is a delightful way for families to bond and embrace the beauty of Islamic traditions. Imagine the joy of working together, picking out colors, and weaving stories into every stitch. It’s a craft that combines creativity, cultural appreciation, and personal expression in one colorful package!
To get started, you’ll need a few essentials. Gather some fabric, preferably cotton or a blend that feels comfortable underfoot. You’ll also want fabric paints, brushes, and stencils. For those who enjoy a bit more texture, adding embroidery thread and needles can elevate your design. The beauty of crafting these mats is that there’s no right or wrong way to create them. It’s all about what speaks to you and your family.
Steps to Create Your Own Prayer Mat
Here’s a step-by-step guide to making your decorative prayer mat:
- Select Your Fabric: Start with a base fabric that is both durable and comfortable. Consider visiting local shops in Auckland for unique fabric choices that reflect New Zealand’s vibrant culture.
- Design Your Pattern: Sketch out a few ideas before committing to a design. Incorporate motifs that hold personal or cultural significance, perhaps taking inspiration from the beautiful patterns seen in Maori art.
- Paint and Embroider: Use fabric paints to bring your designs to life. If you’re feeling adventurous, add embroidery for texture and depth. This is a great moment to involve everyone in the family, from the youngest to the oldest.
- Allow to Dry: Once painted, your mat will need time to dry. Ensure it’s laid flat in a well-ventilated area to avoid any smudging.
- Finishing Touches: After your mat is completely dry, consider sewing a border or adding tassels to the edges for an extra touch of elegance.
Throughout this creative process, remember to share stories and traditions. Perhaps discuss how these mats are used during prayer or talk about the significance of prayer spaces in your home. Engaging in such conversations can deepen the understanding and appreciation of Islamic practices within your family.
Additionally, consider collaborating with local organizations such as the Islamic Women’s Council of New Zealand to showcase your creations or even organize a community craft event. These interactions can foster a sense of community and shared cultural heritage.
By crafting your own decorative prayer mats, you’re not just making art; you’re weaving a tapestry of family memories and cultural appreciation. Plus, it’s a fantastic way to involve everyone in Islamic holiday crafts for families.
Family-Friendly Henna Designs
Gathering the family for some henna fun during Islamic holidays is a fantastic way to bond and get creative together. Henna, known as mehndi in some cultures, is a natural dye used for body art and temporary tattoos. It’s both an art form and a treasured tradition in many Islamic cultures. However, it’s important to remember that even natural products like henna can cause skin reactions, so it’s wise to do a patch test before diving into the designs.
Working on henna designs can be a delightful activity for families. Imagine sitting around the table, each person with their own cone of henna, laughing and sharing stories while creating beautiful designs. You can keep it simple with floral patterns or get adventurous with more intricate motifs. The key is to let your imagination flow and enjoy the process.
Getting Started with Henna Art
First, gather your materials. You’ll need henna powder, lemon juice, sugar, and a plastic cone for application. Here’s a quick guide to mixing your henna paste:
- Mix henna powder with lemon juice to create a thick paste.
- Add a bit of sugar to make the paste smooth and sticky.
- Let the mixture sit overnight to release the dye.
- Transfer the paste to a plastic cone for easy application.
Once you have your henna cone ready, it’s design time! Beginners might start with simple designs like dots, swirls, and vines. More experienced artists can try their hand at intricate paisleys or mandalas. Remember, practice makes perfect, so don’t be discouraged if your first attempts aren’t flawless.
For inspiration, you might look to traditional Maori patterns. Their bold geometric shapes and natural motifs can add a unique twist to your henna art. Additionally, connecting with local groups like the Islamic Women’s Council of New Zealand can provide more ideas and support.
After applying henna, let it dry completely. This usually takes a few hours. To deepen the color, apply a mixture of lemon juice and sugar on top of the dried henna. Then, gently scrape off the dried paste, revealing a beautiful stain that can last for up to two weeks.
Henna art is a wonderful way to celebrate Islamic holidays with family in New Zealand. It’s an activity that blends creativity with cultural appreciation, fostering a sense of togetherness and tradition. Plus, the finished designs are a lovely reminder of your shared time and efforts.
Conclusion
Ultimately, engaging in Islamic holiday crafts as a family not only enhances creativity and personal expression but also fosters deeper connections and cultural appreciation. These meaningful projects, from crafting Eid cards to designing henna art, create lasting memories and traditions that enrich the celebrations of Islamic holidays. Each activity offers a joyful opportunity to weave family bonds and embrace the beauty of shared heritage. Enjoy the crafting journey with your loved ones and let the festive spirit fill your home. Happy crafting!
Continue Exploring
Looking to transform your family dinners into memorable conversations? Dive into our checklist that guarantees engaging and meaningful dialogues with your loved ones.
Frequently Asked Questions
What materials are needed to create Eid cards with family?
To create Eid cards, you’ll need colored paper, markers, stamps, stickers, and possibly some traditional elements like crescent moons or stars. You can also incorporate Maori designs to reflect New Zealand’s cultural heritage.
How can families in New Zealand create DIY Ramadan lanterns?
Families can create DIY Ramadan lanterns by gathering materials such as colored paper, scissors, glue, and a small LED candle. Decorate with glitter and stickers, then assemble the lantern by cutting, folding, and securing the paper into a cylindrical shape.
What are some tips for beginners starting with Islamic calligraphy art?
Beginners should start by choosing a meaningful phrase and practicing basic strokes. It’s helpful to sketch the design lightly before inking and to incorporate decorative elements or Maori designs to add a unique touch to the artwork.
Fatima Ansari is an Islamic educator and writer with over a decade of experience teaching Quran and Islamic studies to children and families in Western Muslim communities. Growing up in North America, she saw firsthand the challenges Muslim families face in balancing faith with modern life, which inspired her to share practical guidance rooted in the Quran and Sunnah. Her mission with E-Quran Learning is to make Islamic education accessible, relatable, and inspiring for Muslim families across the United States, United Kingdom, Canada, Australia, and New Zealand.